Premier Edmonton Drywallers: Top Quality and Integrity
Wiki Article
Understanding the Art of Drywall Installation: Proven Techniques for a Flawlessly Smooth Surface
In this discussion, we will explore the proven methods that can help you understand the art of drywall installment and attain that perfectly smooth finish you desire. From preparation and prep work to the last finishing touches, we will dive right into the important steps and techniques that will certainly raise your drywall setup game.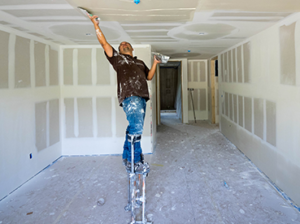
Planning and Prep Work
Appropriate planning and extensive preparation are essential for an effective drywall setup project. Prior to starting the setup process, it is essential to carefully review the area and determine the essential materials and tools. This initial action sets the structure for a smooth and effective task.This makes certain that the right quantity of drywall is purchased, protecting against delays or extra prices due to material scarcities. Dealing with these problems prior to installation will result in a much more sleek and professional surface.
Following, a thorough layout plan must be developed. This strategy includes the positioning of the drywall panels, taking into account any kind of openings for doors, windows, or electrical outlets. By producing a thorough layout, possible problems or difficulties can be determined and settled prior to the installation process begins.
Prep work of the workspace is additionally important. drywall contractors. This includes removing the area of any furniture or objects that may impede the installation process. Additionally, safeguarding the floorings and bordering surface areas with ground cloth or plastic sheets will certainly stop damages and make clean-up less complicated
Devices and Products
To ensure an effective drywall installment task, it is important to have the essential devices and products handy. Having the right devices will not only make the work much easier but likewise make certain a specialist and exact finish. The adhering to are several of the trick devices needed for a smooth drywall setup:- Measuring tape: Exact dimensions are important for a seamless setup. A measuring tape will certainly assist you figure out the dimensions of the drywall sheets and guarantee they fit completely.
- Utility blade: A sharp utility blade is crucial for cutting drywall sheets to the desired dimension. It must be used to rack up the front paper layer and then broke along the scored line for a tidy cut.
- Screw gun: A screw weapon or drill with a drywall screw add-on is required to safeguard the drywall sheets to the studs or framing. It permits reliable and quick installment of screws without damaging the drywall.
- T-square: A T-square is made use of to guarantee precise and straight cuts when noting and scoring the drywall sheets.
- Joint substance: Additionally referred to as mud, joint substance is utilized to cover and conceal the seams between drywall sheets. It is important to select the best kind of joint compound for the certain project, such as setting-type or ready-mixed.
In addition to these devices, it is also essential to have the essential materials, including drywall screws, joint tape, edge beads, and sandpaper. By having the right tools and products, you will be well-prepared for a successful drywall installation task.
Reducing and gauging Drywall
Accurate measurements and specific cutting are vital for an effective drywall installment project. Before reducing the drywall, it's critical to measure the area where it will be mounted accurately. Begin by making use of a gauging tape to identify the elevation and size of the wall surface. Record these measurements and after that move them onto the drywall sheet. Use a straight edge, such as a T-square, to create straight lines for cutting.To make the cutting process much easier, score the drywall along the measurement lines using an utility knife. Apply firm pressure to develop a superficial groove in the drywall surface area. Meticulously snap the drywall along the racked up line by flexing it away from the racked up side. Complete the cut by utilizing the utility knife to trim any type of staying paper and gypsum.
When reducing openings for various other fixtures or electric outlets, procedure and mark their positions on the drywall sheet. Use a keyhole saw or a drywall attended meticulously cut along the marked lines, making certain the openings are clean and accurate.
Remember to drywall Edmonton use security goggles and handwear covers while reducing drywall to protect on your own from any type of potential injuries. By following these actions and taking precise dimensions, you will achieve specific cuts, leading to a smooth and professional-looking drywall installment.
Setting Up and Securing Drywall
After efficiently determining and reducing the drywall, the next action in the installation process is securing it in place. Effectively securing the drywall makes certain a sturdy and steady installment that will stand the examination of time. When it comes to safeguarding and mounting drywall., there are several techniques to consider.One typical approach is to make use of drywall screws. These screws are particularly created for drywall installment and have a sharp factor that easily permeates the drywall and a crude string that provides strong holding power. When utilizing screws, it is very important to drive them in just adequate to secure the drywall without breaking the paper surface area. Overdriving the screws can cause dimples or perhaps punctures on the surface of the drywall.
One more method is to use drywall nails. Nails are generally used for temporary installations or in locations where screws can not be utilized. Nevertheless, nails have a tendency to have less holding power compared to screws and can possibly pop out in time. It is very important to make use of the right size and size of nails for the work and to area them suitably to make certain a safe and secure setup.
Along with nails and screws, adhesive can likewise be made use of to protect drywall. Drywall adhesive is applied to the studs or various other surface areas prior to placing the drywall, giving an additional layer of adhesion. This technique is particularly beneficial for ceilings or curved walls where the weight of the drywall can create it to sag or flex.
Despite the technique used, it is necessary to guarantee that the drywall is effectively protected and flush versus the studs or various other surfaces. This will protect against sagging, fracturing, or other concerns that can arise gradually. By adhering to these verified approaches, you can achieve a completely smooth surface area and master the art of drywall setup.
Ending Up Techniques and Accomplishing a Smooth Surface
After the drywall setup process is full, the next step is to prepare the surface area for painting or wallpapering. Sanding need to be done meticulously, using a fine-grit sandpaper, to avoid harming the drywall. By utilizing these finishing strategies, a completely smooth surface area can be accomplished on drywall, guaranteeing a professional and aesthetically pleasing outcome.Final Thought
In verdict, mastering the art of drywall setup calls for careful planning, exact measuring and cutting, and skillful completing strategies. Attention to detail and correct installment and securing of the drywall are necessary for an effective task.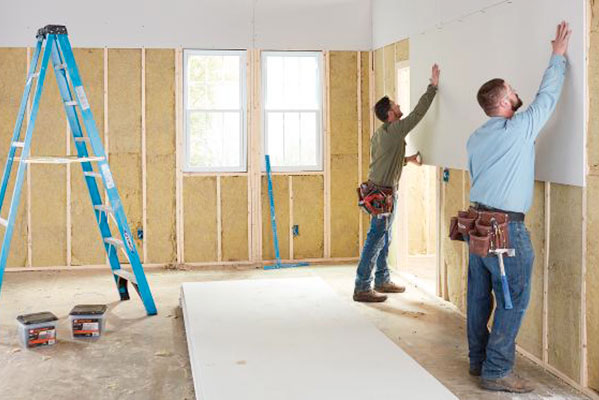
After the drywall installation process is full, the next step is to prepare the surface area for paint or wallpapering.
Report this wiki page